Meet our new our new tracker partner – MaxConv!
MaxConv is an ultimate cloud-based tracker designed to simplify the tracking and optimization of your campaigns.
Why should you give it a shot?
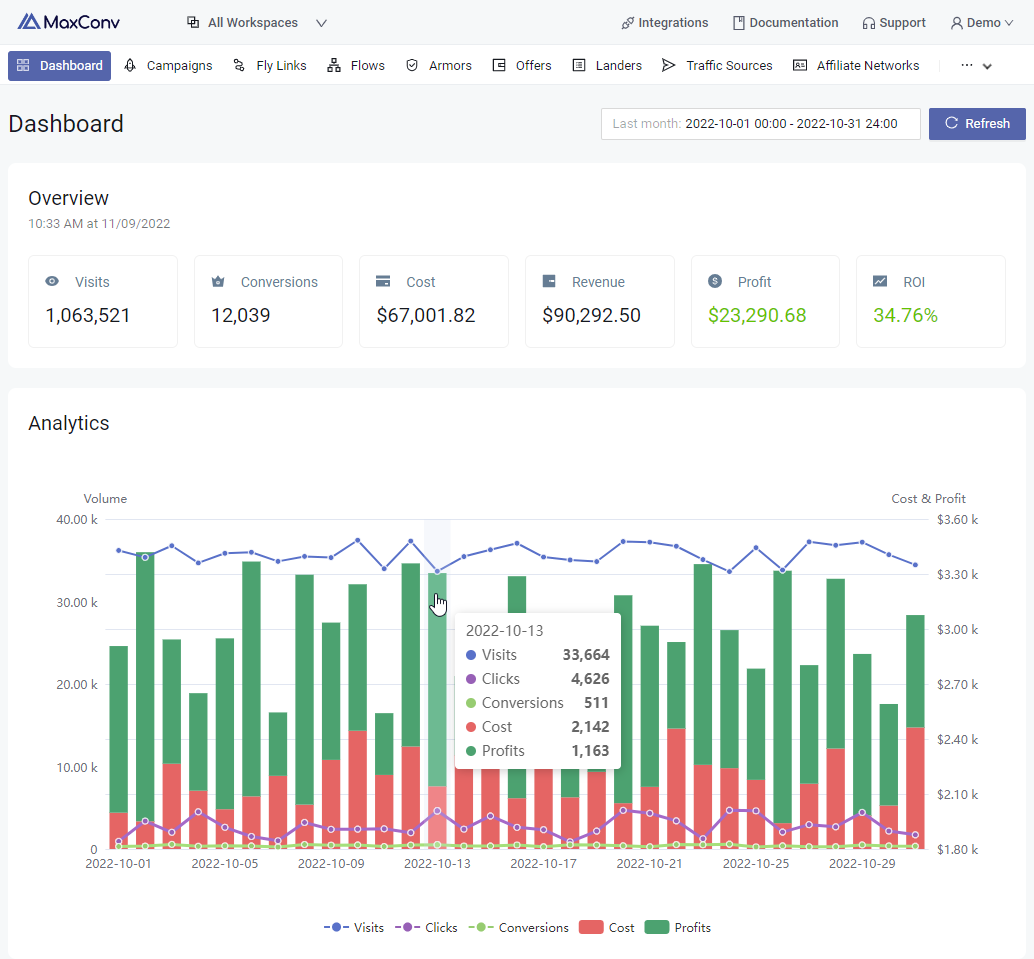
– Spot-on data: Your campaign spending data syncs seamlessly with MaxConv, providing spot-on reports. Easily navigate through different dimensions of your data and get profitable insights.
– Reasonable Pricing. Picture this – a free plan offering 150k events per month. But it gets better! Paid plans starts at $45 per month, offering 1 million events (a penny saved is a penny earned 😉)
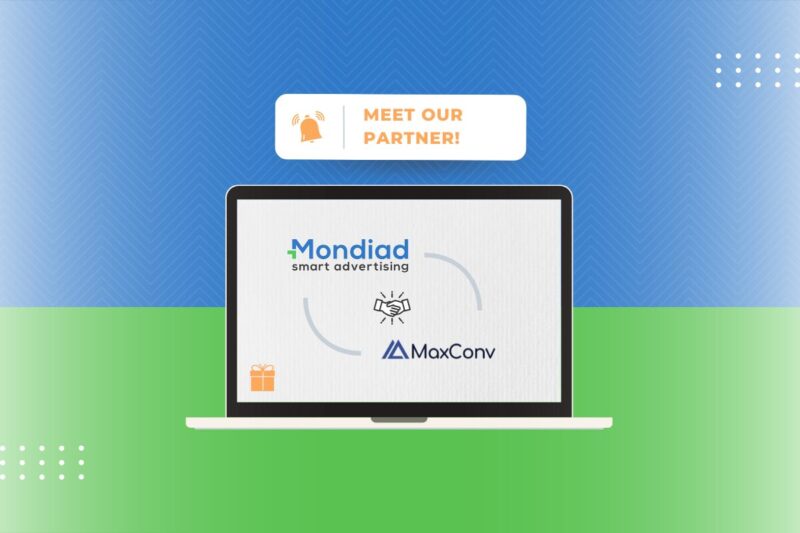
– Intuitive UI: MaxConv’s dashboard is not just a dashboard; it’s an experience. Navigating through your data has never been this smooth, thanks to its clean and user-friendly interface.
By the way, their support is great! Feel free to ask them any questions you have.
👉 Feeling intrigued? Take the plunge and sign up. 👈
Here’s an extra bit of good news: until 31 December, use the coupon code MONDIAD when subscribing to the starter plan, and you’ll only need to pay $1 for the entire month. 🎁
Mondiad x MaxConv integration guide
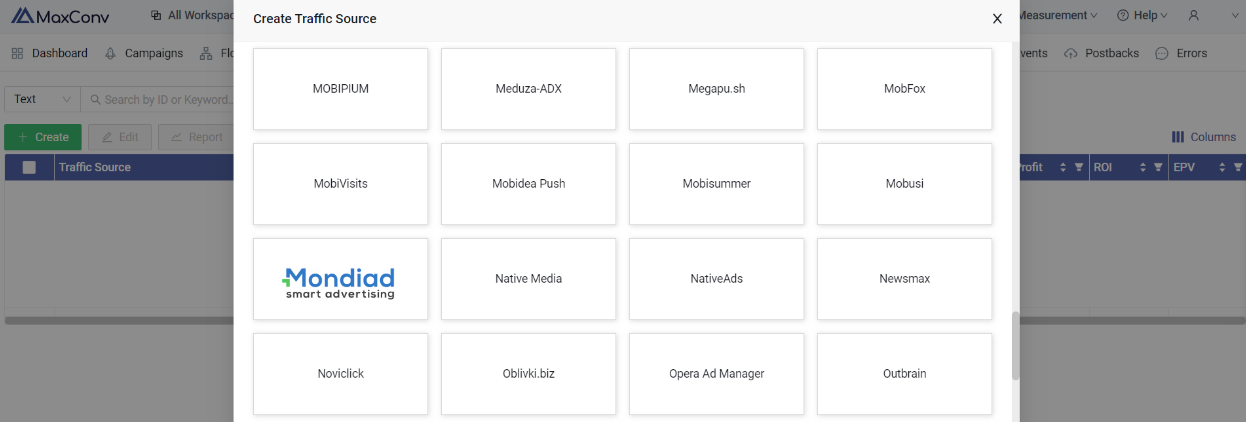
STEP 1: Select Mondiad as your traffic source from the pre-made templates in MaxConv
Traffic Sources -> Create -> Select Mondiad*
*To add from a template, just click the traffic source name you want to add, you can use the top search box to search through the list by keyword.
When the template opens up, fill in the necessary data, then check to see if everything is all right and adjust if needed. When you are ready, click the Save button.
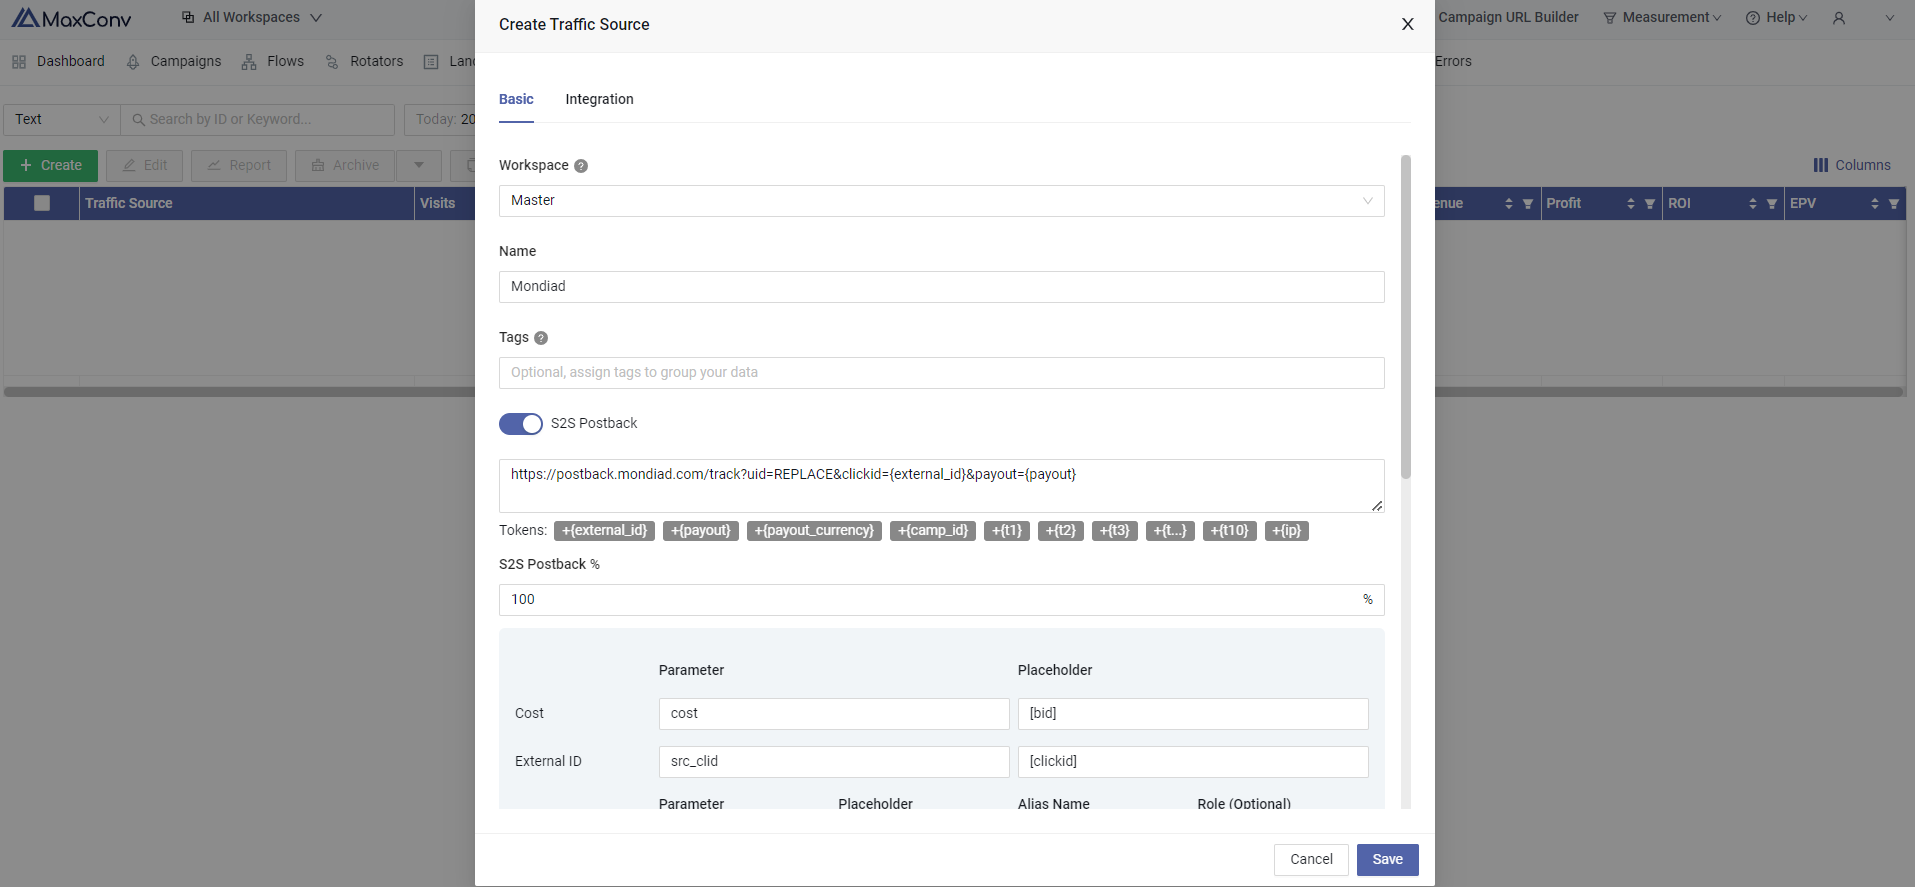
The S2S Postback is used to send conversions from MaxConv to Mondiad so make sure this feature is enabled and correctly configured.
STEP 2: Create a campaign in ManConv
Go to the campaigns tab then click the Create button to start a new campaign.
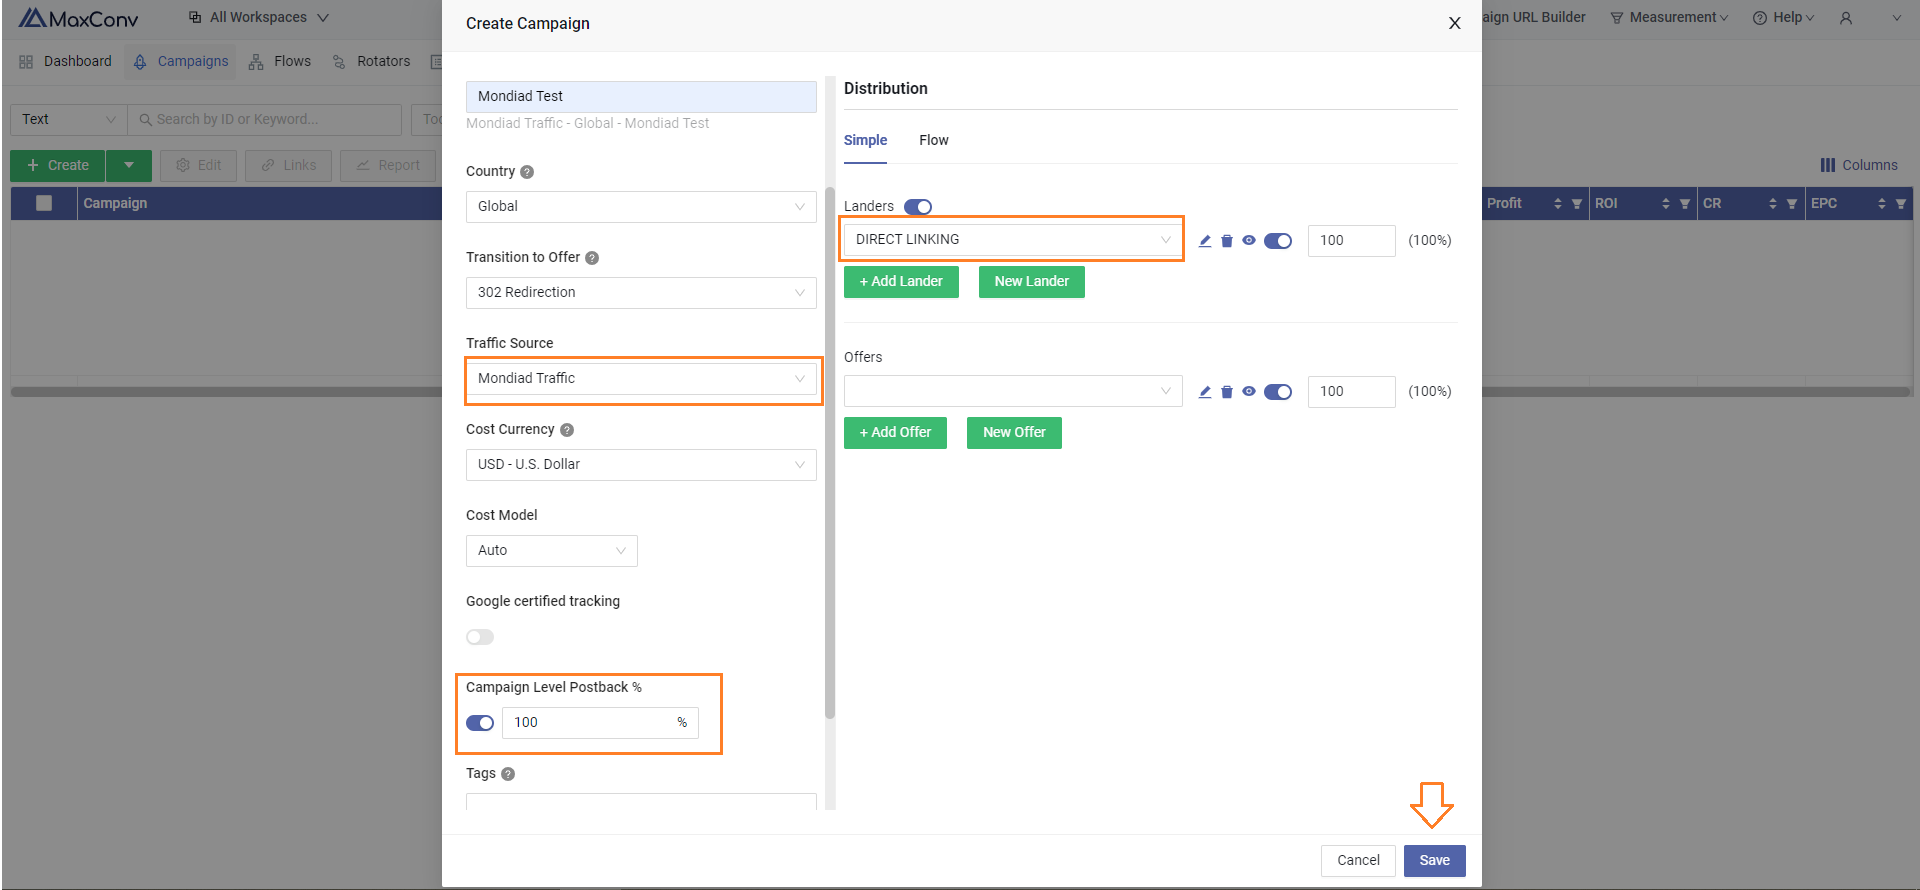
- Give your campaign a name
- Select Mondiad as your traffic source
- Enable Campaign Level Postback % to make sure you pass conversions correctly.
- Setup up your landers
- Add your offer
- When all is configured to your liking, hit the save button.
Now that the campaign is set up, you’ll need to grab the campaign URL. Go to Campaigns -> Select your campaign -> Click on the Links button -> A side panel with all the links will appear to the right.
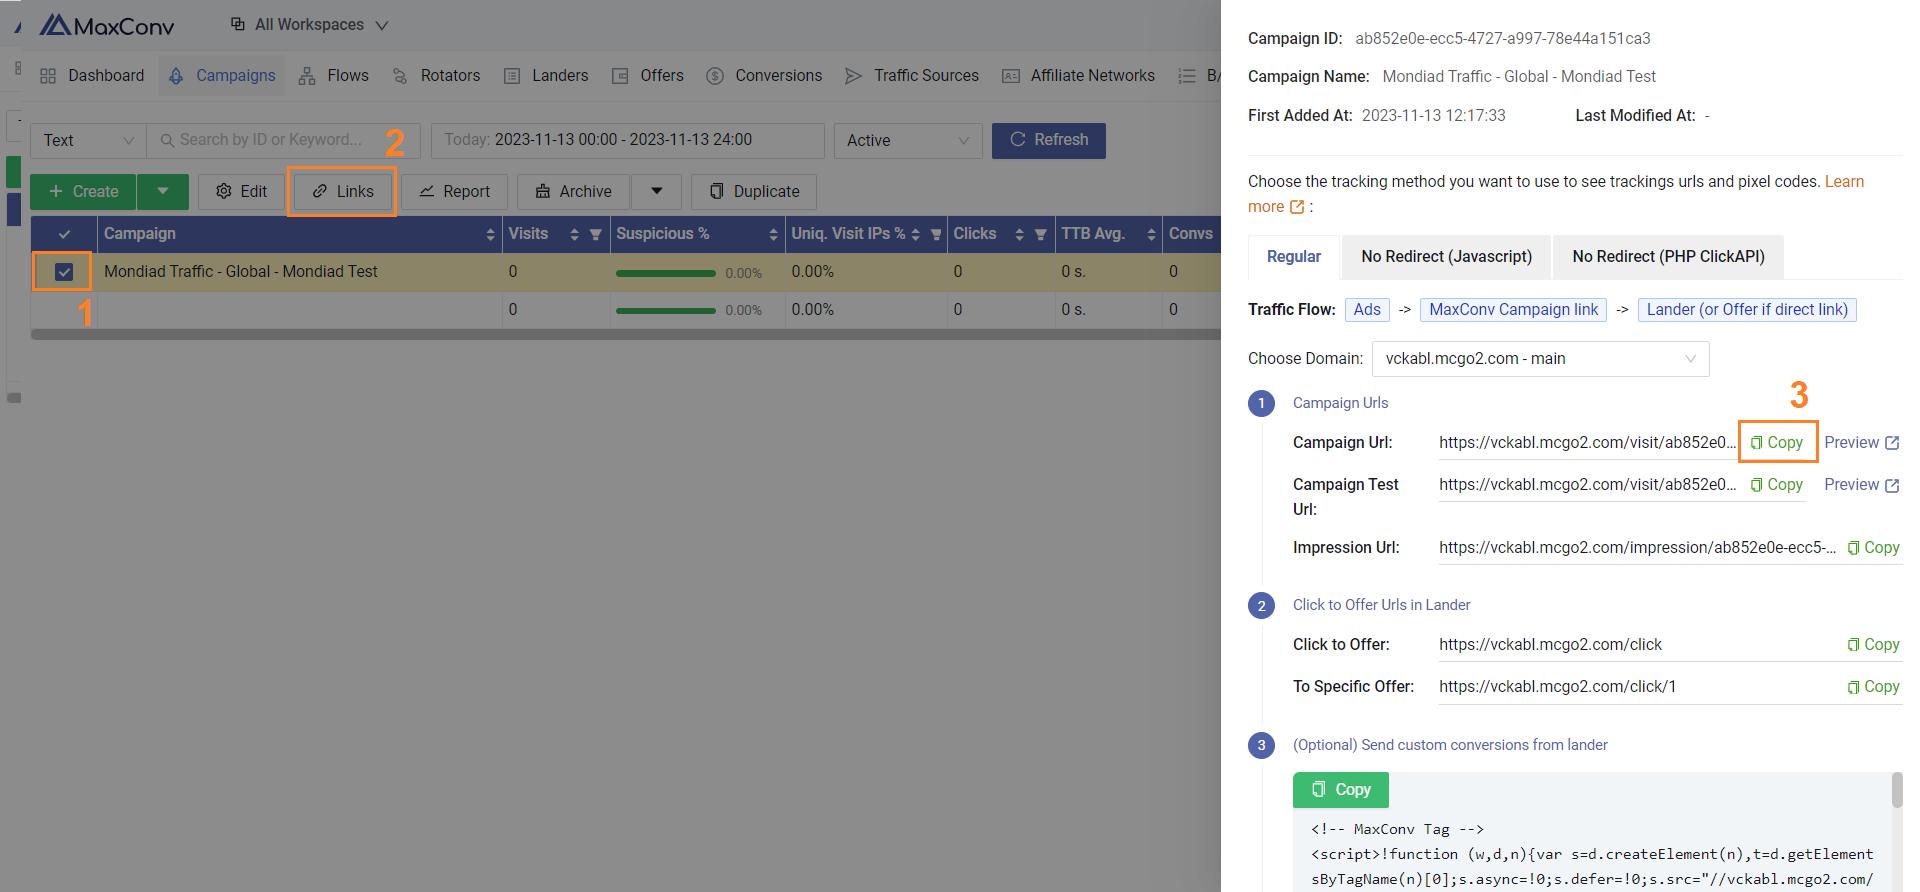
Now copy the Campaign URL and head over to Mondiad, to place it as a Target URL, in a new Mondiad campaign.
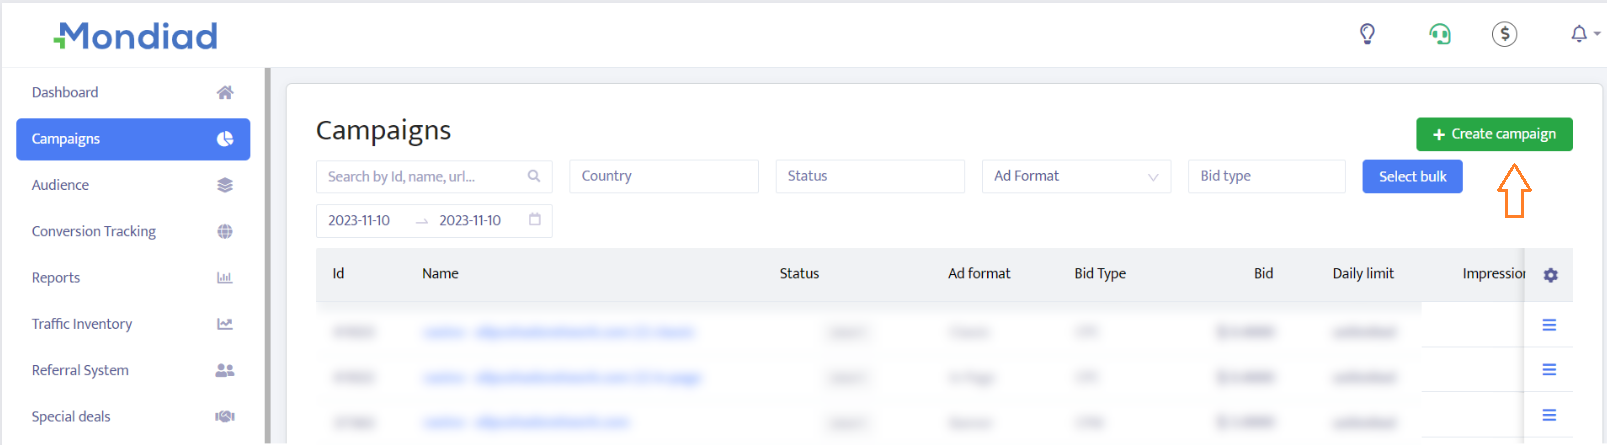
STEP 3: Create your Mondiad ad campaigns
Log in to your Mondiad advertiser account -> go to the Campaigns tab -> Create campaign button.
Here, to pass data, paste your Campaign URL generated earlier in MaxConv into your Mondiad campaign Target URL*.
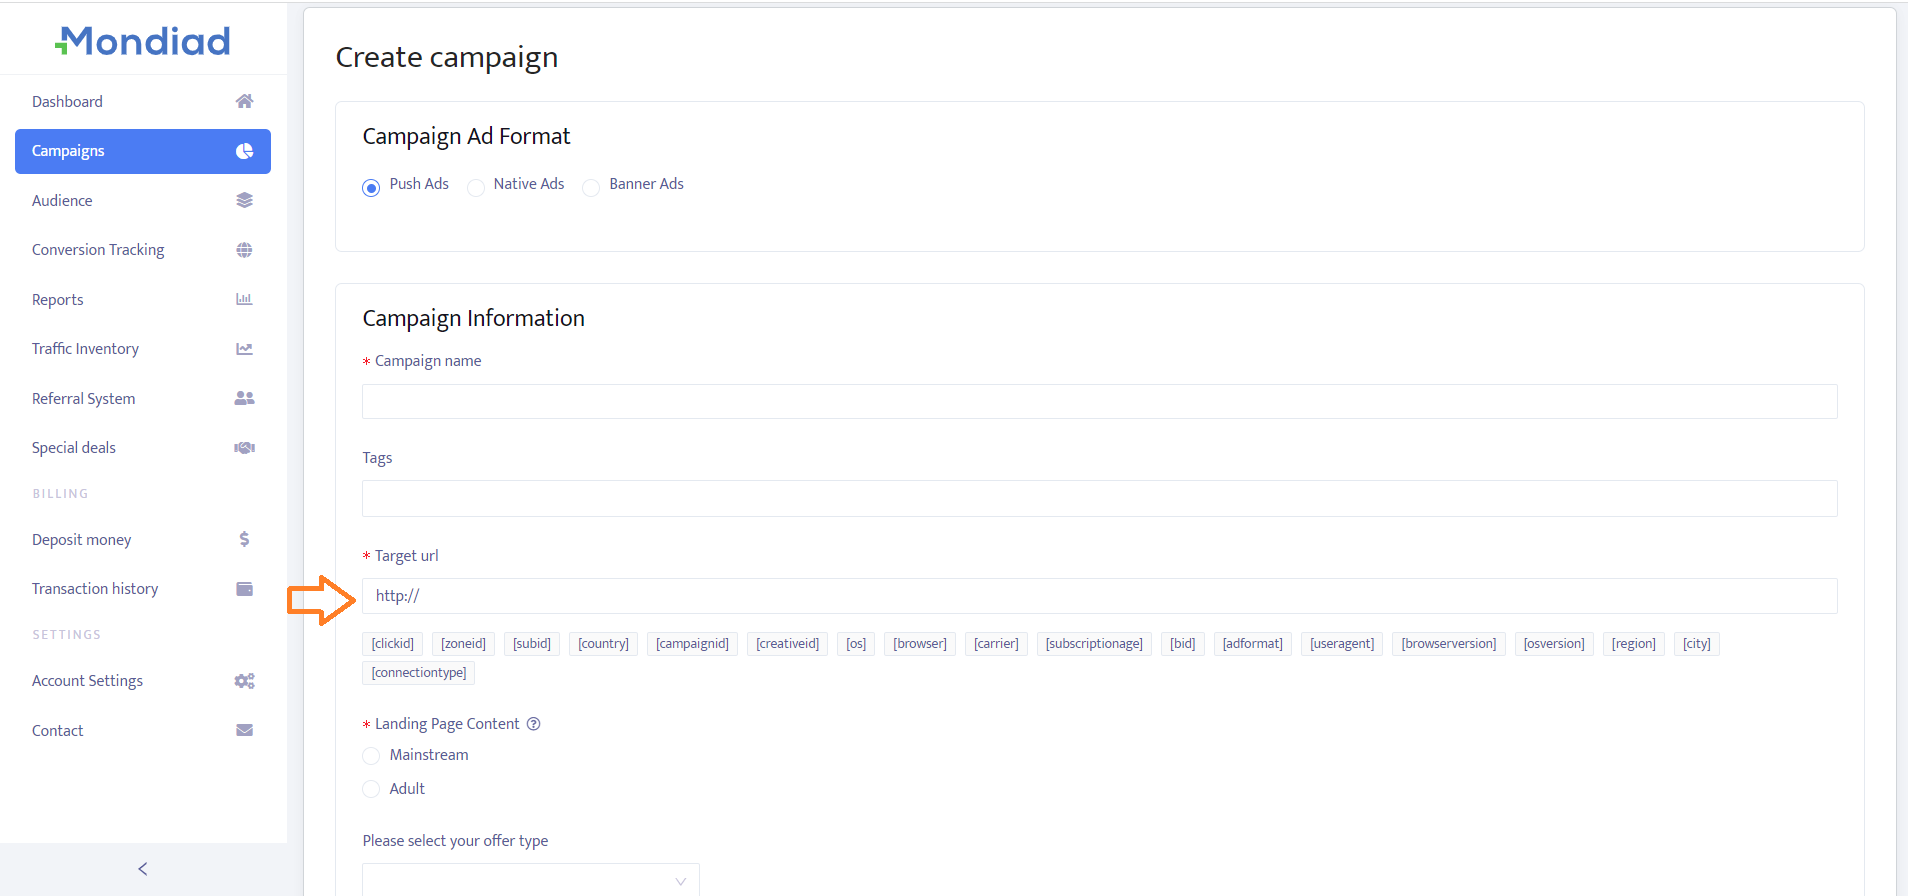
*Target URL = Campaign ULR from MaxConv.
Then, to fully configure your ad campaign, follow our step-by-step guide and you are all done.
If you need additional help, don`t forget the support team is happily at your disposal.