


Installing your Mondiad ad codes into your WordPress websites is a super quick and easy process. All setup can be done in less than 10 minutes while no tech skills are needed. Let us show you how.
Table of Contents
Preparations
⚠️ Before grabbing your ad code, make sure you have:
After you submit your website, set up your ad zones and ad display parameters, then copy the Mondiad-generated script and paste it into your website. Notice that each Mondiad ad format has slightly different implementation instructions, thus ensure you are checking all the ad code implementation steps on our Help Center.
- For the Classic Push ad code, you’ll also need to download and insert another Mondiad file into the root of your website.
- For Native and Banner ads, keep in mind that there are two codes: The ad delivery code & The Element code.
***
Method 1: Insert the Mondiad ad code manually, by updating your website theme.
1. Login to your Mondiad publisher account and get the ad code for your website.
For each ad format, follow the instructions in the pop-up window to learn how to integrate the ad code into your website. You can also check out this Help Center article on how to do it.

2. Head over to your WordPress dashboard -> the Appearance tab -> Theme File Editor -> Theme header(side right panel);
Here, insert the ad code from your Mondiad account into the instructed place: your website’s Head (anywhere between <head> and </head> tags);
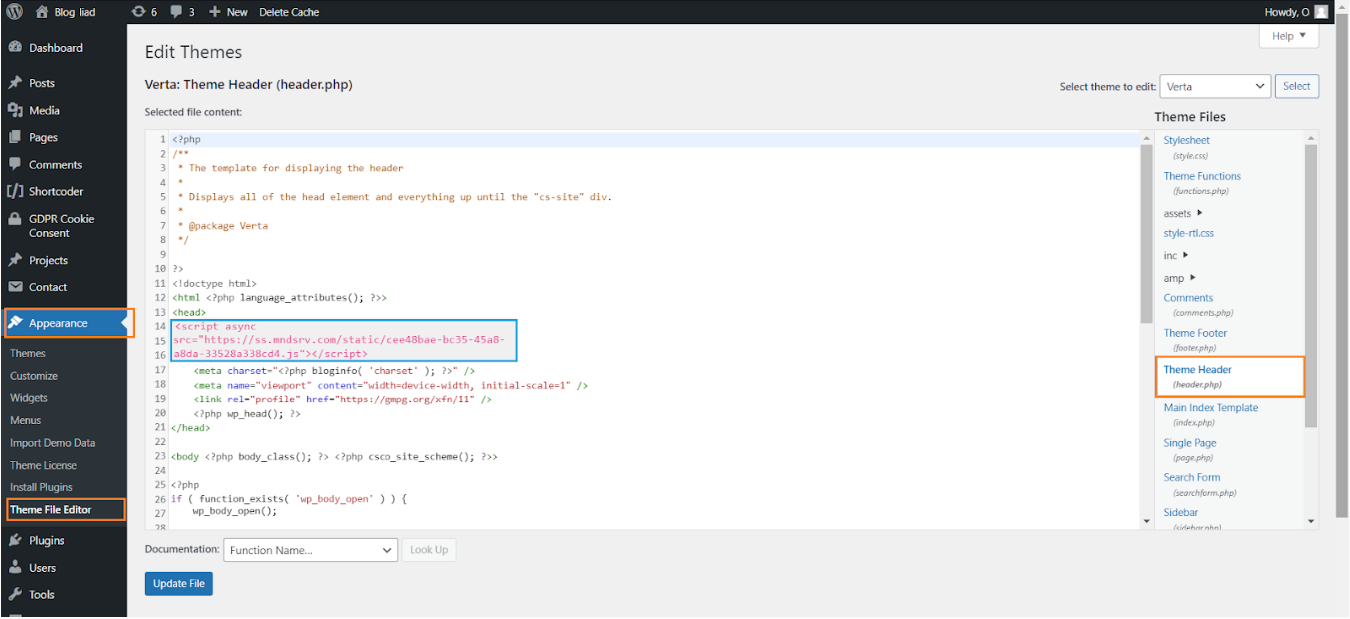
When you are done, hit the “Update File” button to confirm changes and you’re good to go.
***
Method 2: Insert the Mondiad ad code using the Mondiad WordPress plugin.
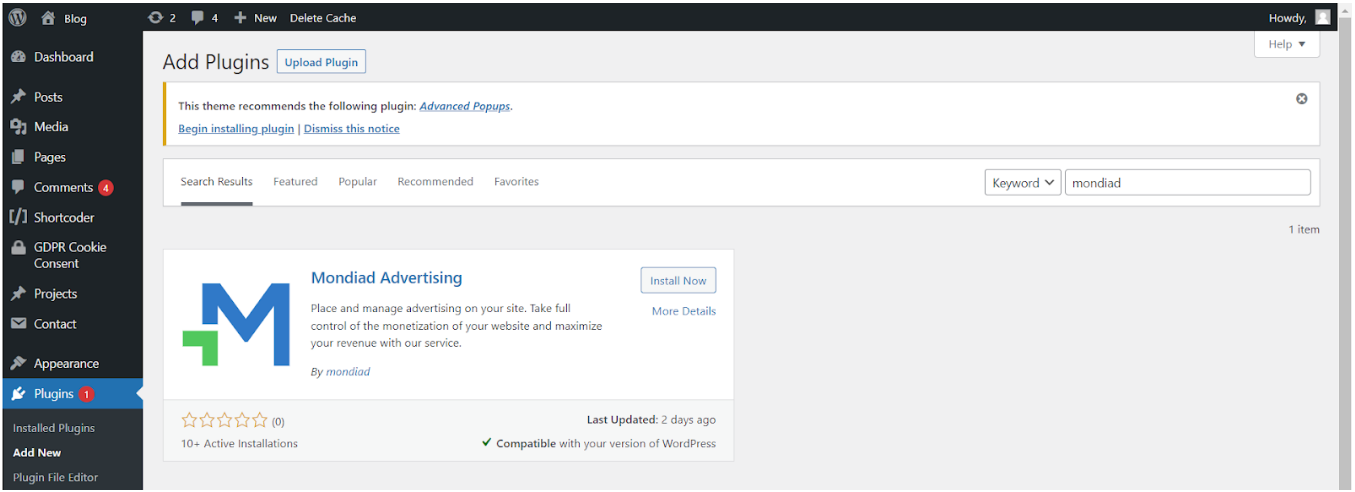
Another method you can integrate your Mondiad ad code into your WordPress website is via the Mondiad ad code integration plugin. Install the plugin then continue reading to see how to configure the ad code into your website. You can also find these instructions directly in the plugin description, in the installation section.
1. Authorisation
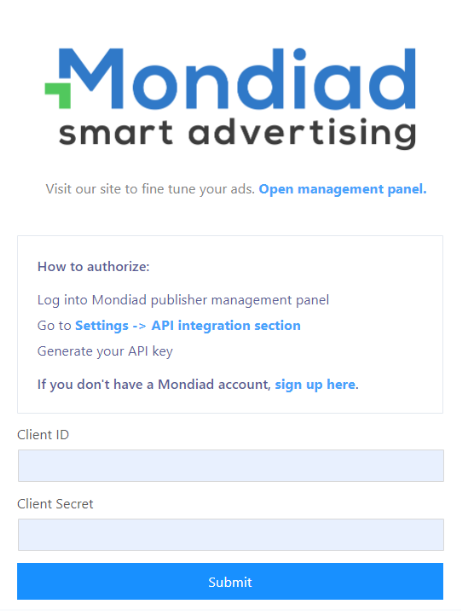
- Log into your Mondiad publisher account.
- Go to Settings -> API integration -> Generate your API Key
- Enter your client ID/secret into the authentication form within the plugin
2. Website selection
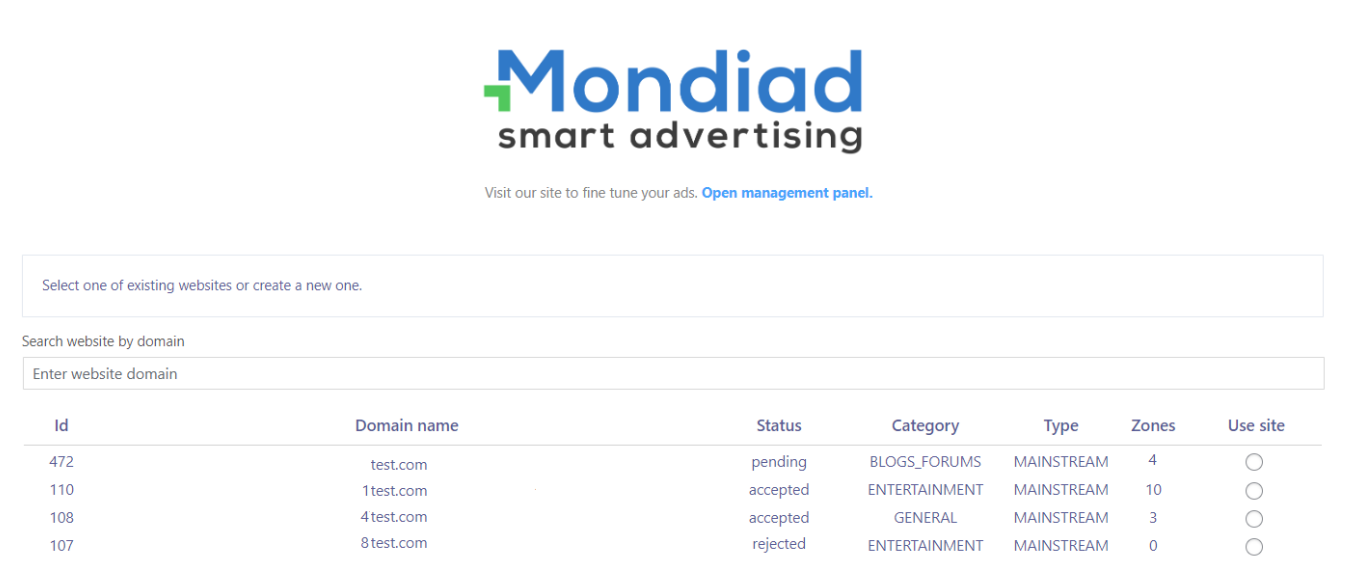
Submit your website or make your selection from your list of available websites.
*The website URL from which you are searching will be prioritized.
3. Ad Zone configuration
After selecting your website(which will be shown right under our logo), it’s time to configure your ad zones.
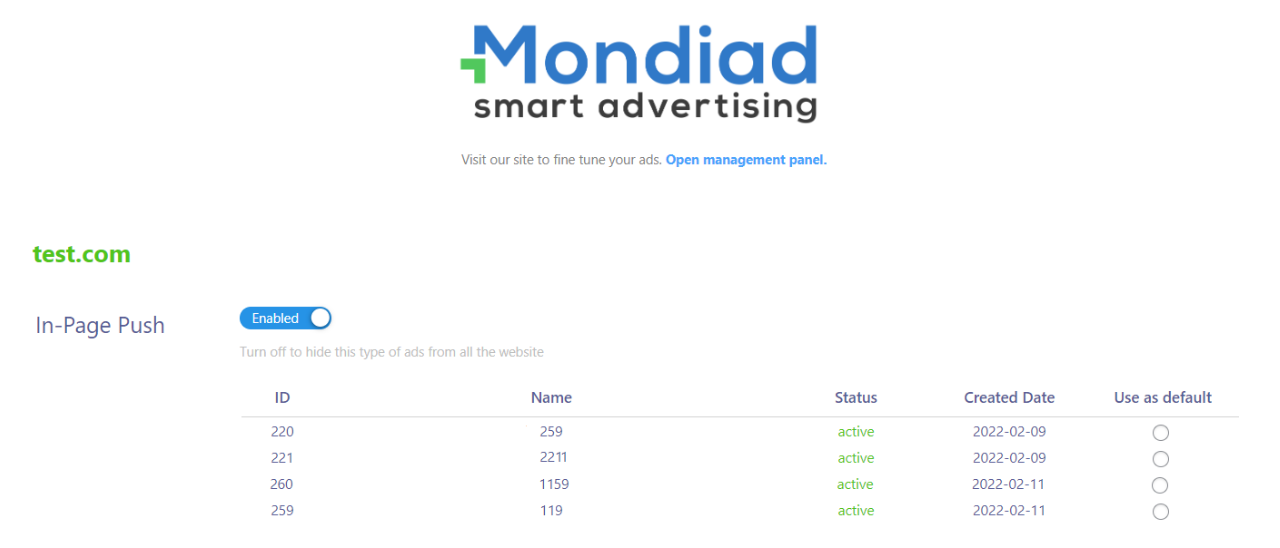
- You can use an ad zone as a default for all your website pages via the “Use as default” button, at the end of it.
- Once you set an ad zone as default, you’ll be able to remove it.
- You can easily enable or disable ad zones at any time, via one click.
***
Troubleshooting
Common issues of ads not showing:
- The ad code was not added properly. Please check if the code is installed in the site’s head (between <head> and </head>)
- After you copy and paste your adzone code into your website, you will see your first ad after 2 seconds and also it depends on your advanced settings.
- AdBlock Detection was not bypassed. If you have AdBlock installed on your browser, then you will not be able to see the ad.
***
Recommendations
- Don’t oversaturate your website with ads for profit but keep a decent ratio of ads on your website pages.
- Whenever you’re adding a new ad code, preview it and ensure it blends with the website layout.
- Customize your ad zone settings ad they are a very game-changing element. Make sure you are configuring your ad zone settings. In Mondiad you can customize the widget position, display delay, timeout after ad click, timeout after ad close (push ads) and title, columns, rows, backgrounds colour, layout, creative ratio, effects and many more elements.
- For the ads to appear on your website, don’t forget to check if your website is approved in the Mondiad platform. After submitting a website, it takes about less than one hour to be approved(working days).