If you’re looking for a free solution to better understand your Mondiad audience, Google Tag Manager might be for you.
What is Google Tag Manager?
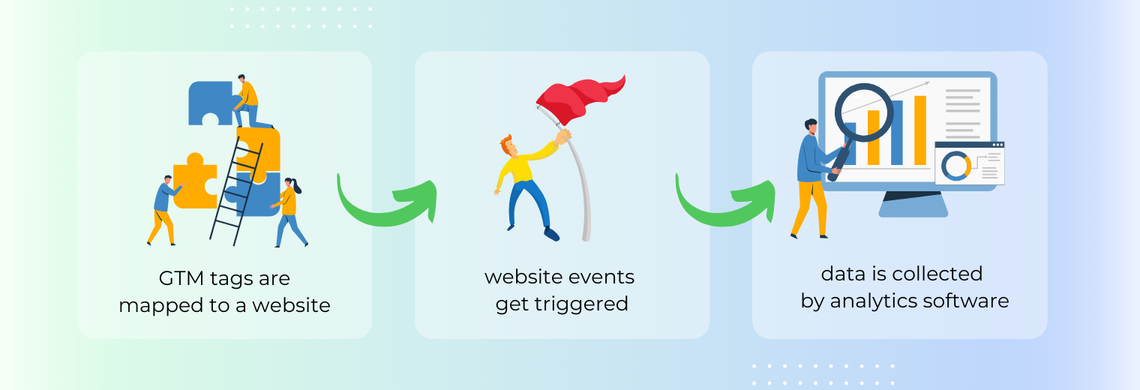
Google Tag Manager (GTM) is a free tool provided by Google that allows it’s users to track user behaviour, events, and conversions by adding several tags (snippets of code) on a website( or mobile app).
Google Tag Manager is best for anyone who needs easy control over tracking and understanding user behaviour, conversions, and similar data, to further optimize their marketing efforts. By setting up tags and triggers correctly, marketers, advertisers, brands, or webmasters can effectively improve their results based on specific data.
Google Tag Manager (GTM) essentially acts as a middleman to manage your tags and send data to analytics tools.
To track ad campaign data using Google Tag Manager (GTM), you’ll want to focus on setting up the right tags, triggers, and variables to capture relevant data from your campaigns. These elements will allow you to track when users complete specific actions (e.g., purchases, form submissions) as a result of clicking on your ad.
ℹ️ The GTM container is a small JavaScript code snippet that holds all the tags, triggers, and variables. Think of it as your central code for your website. You can update any of these items within the GTM interface, and changes will reflect on your site, without needing to redeploy the GTM container.
ℹ️ Tags are the snippets of code added through GTM that send data to third-party tools( like Google Analytics), or other analytics platforms. Examples of tags include tracking scripts for analytics, heatmaps, or conversion tracking.
ℹ️ Triggers listen for specific actions or events on your website (like page views, button clicks, form submissions, etc) and fire the associated tag when those conditions are met.
ℹ️ Variables store data like page URLs and clickIDs that GTM uses for tags and triggers. For example, if you want a tag to fire only on specific page URLs, you could use a variable to check for the URL condition.
Google Tag Manager setup prerequisites:
- A GTM account and container created for your website.
- Access to your website’s source code.
- A code snippet provided by Mondiad
- Basic understanding of how GTM, Google Analytics, or other analytics tools work. (don’t worry, just keep reading) 😉
The Google Tag Manager setup process
💡 To use Google Tag Manager, you must already have a Gmail account or any account for Google services.
Head over to Google Tag Manager to set up an account.
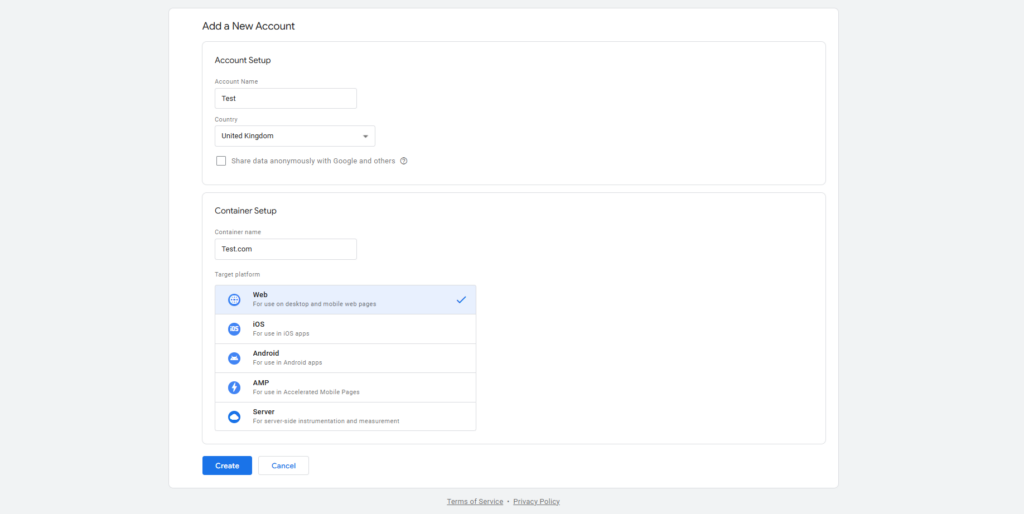
Click on “Create Account” and fill in your account name, container name (usually your website’s domain), and select “Web” as the target platform. When ready, click “Create” and agree to the terms of service.
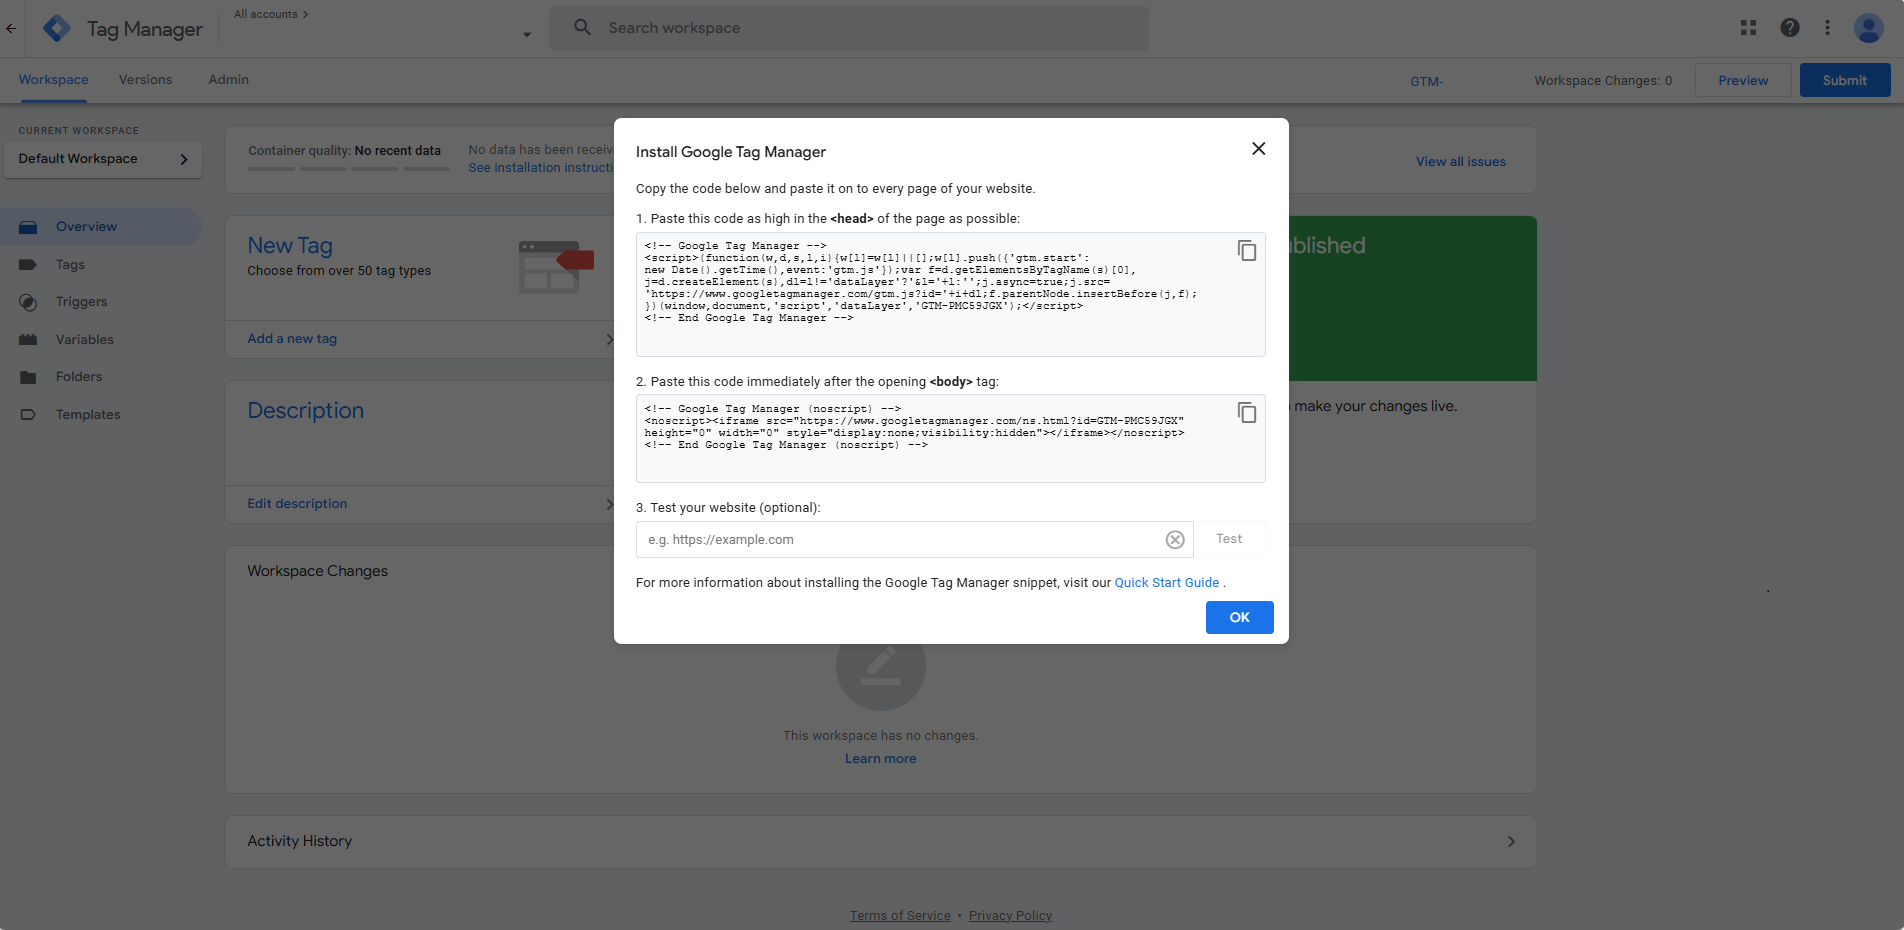
After creating the container, you’ll receive a code snippet. Place the first part in the <head> section and the second part immediately after the opening <body> tag of your website’s HTML.
💡 There are several ways to install the code into your website, so we won’t go into detail but feel free to ask us for assistance, if needed.
To ensure your code is working properly, use the test feature to open your website in a new window, showing which tags are firing.
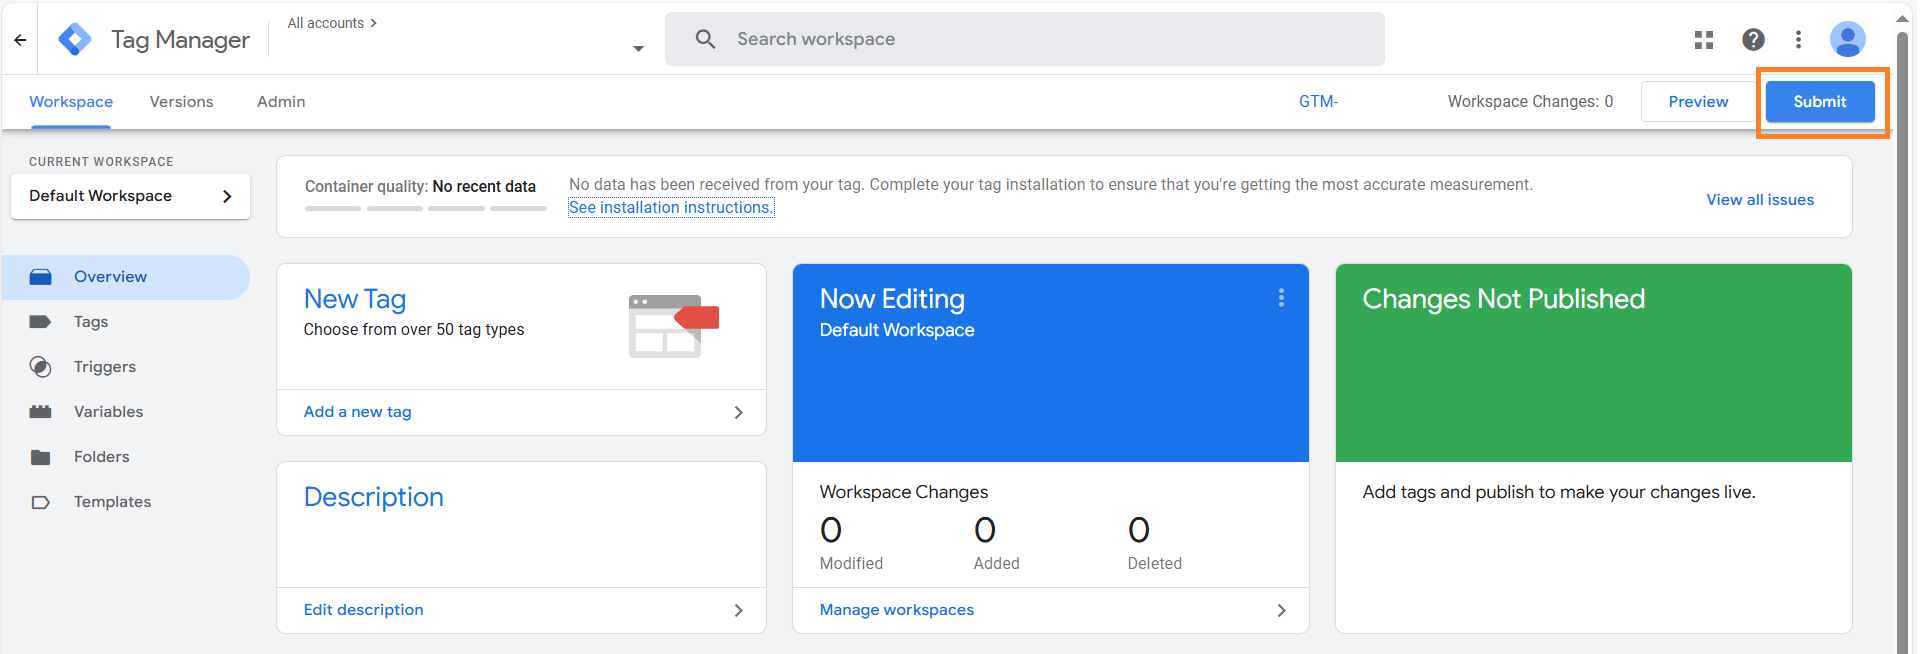
When ready, click the Submit button in the GTM dashboard to publish your container.
💡 You can also check if your GTM code is installed on your website by reloading the page then right-click to view the page source. Simultaneously press CTRL + F to open the search bar where you can copy your code and check if it’s highlighted in your page HTML.
Now that you’ve got GTM installed on your page, you are ready to set up further tracking requests, including data coming from Mondiad.
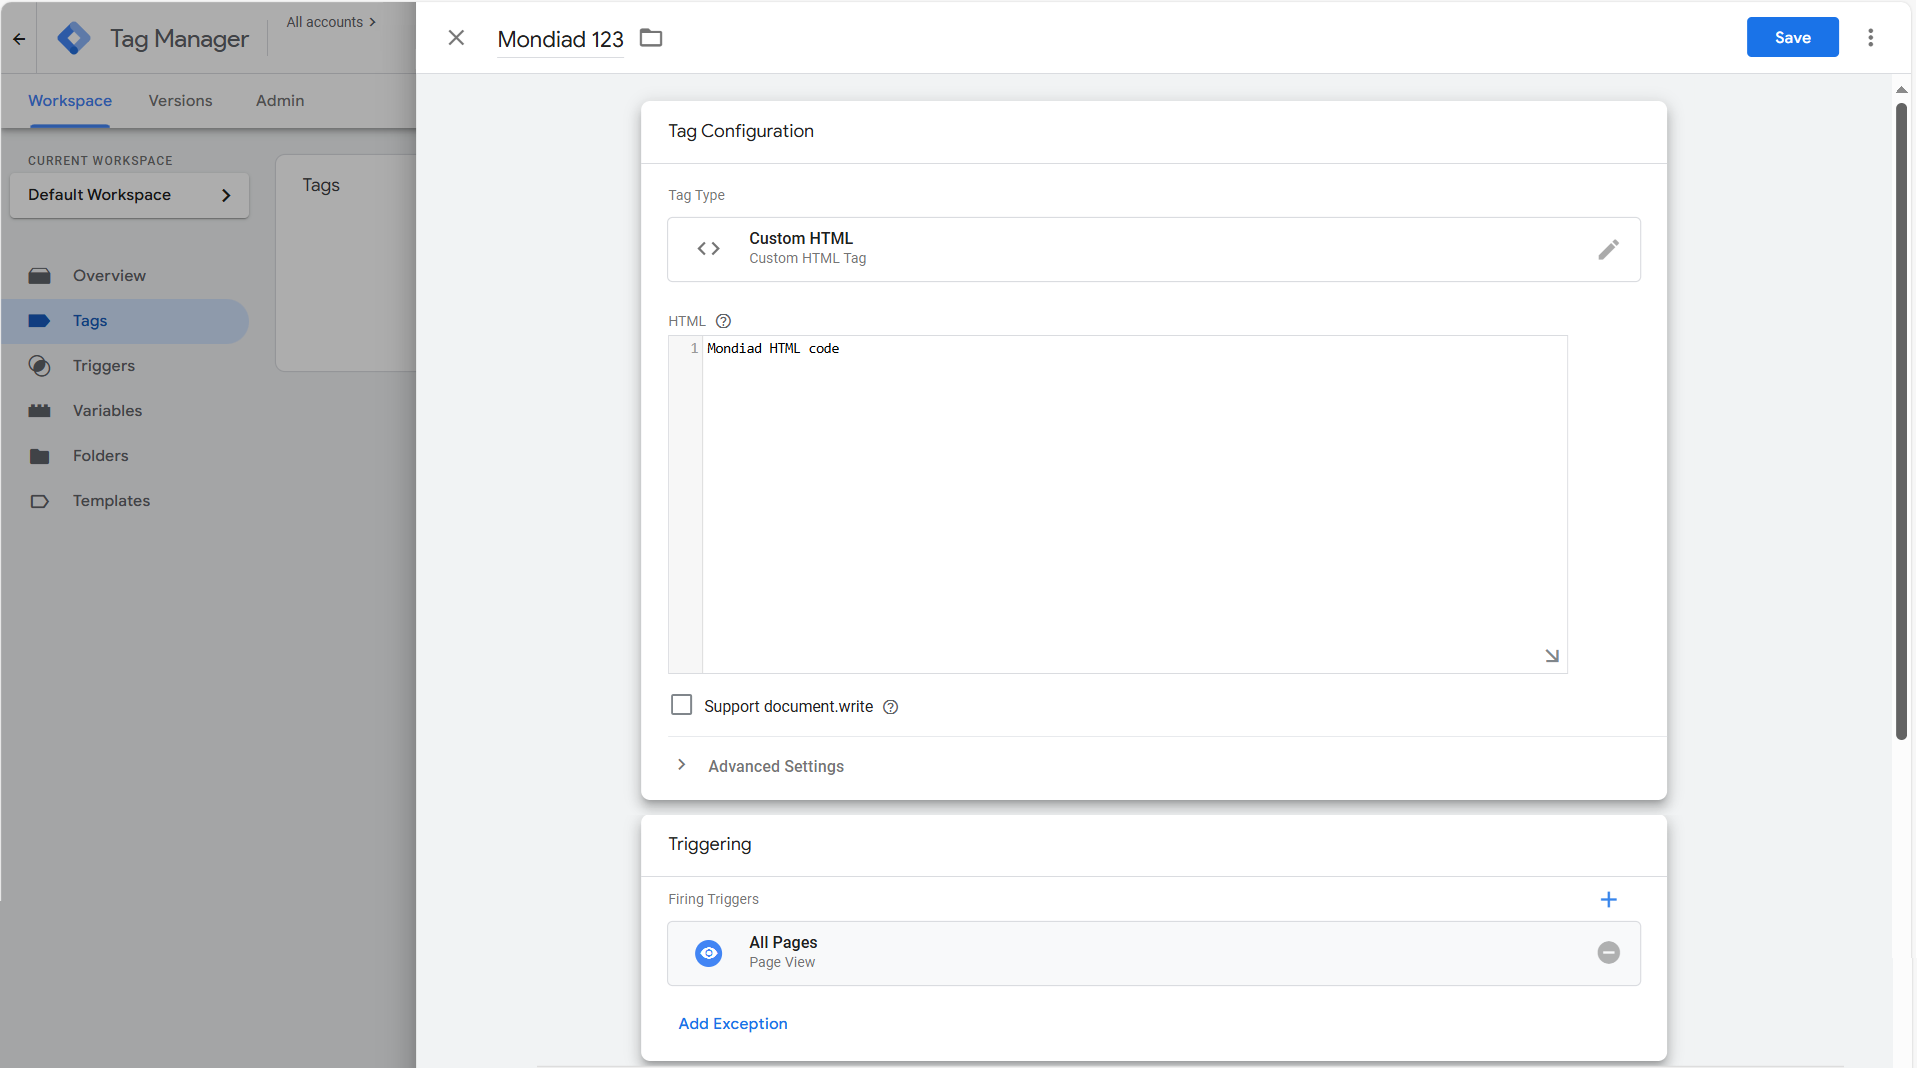
In your GTM dashboard, head over to the “Tags” tab. Here, create a new tab and fill out the required fields.
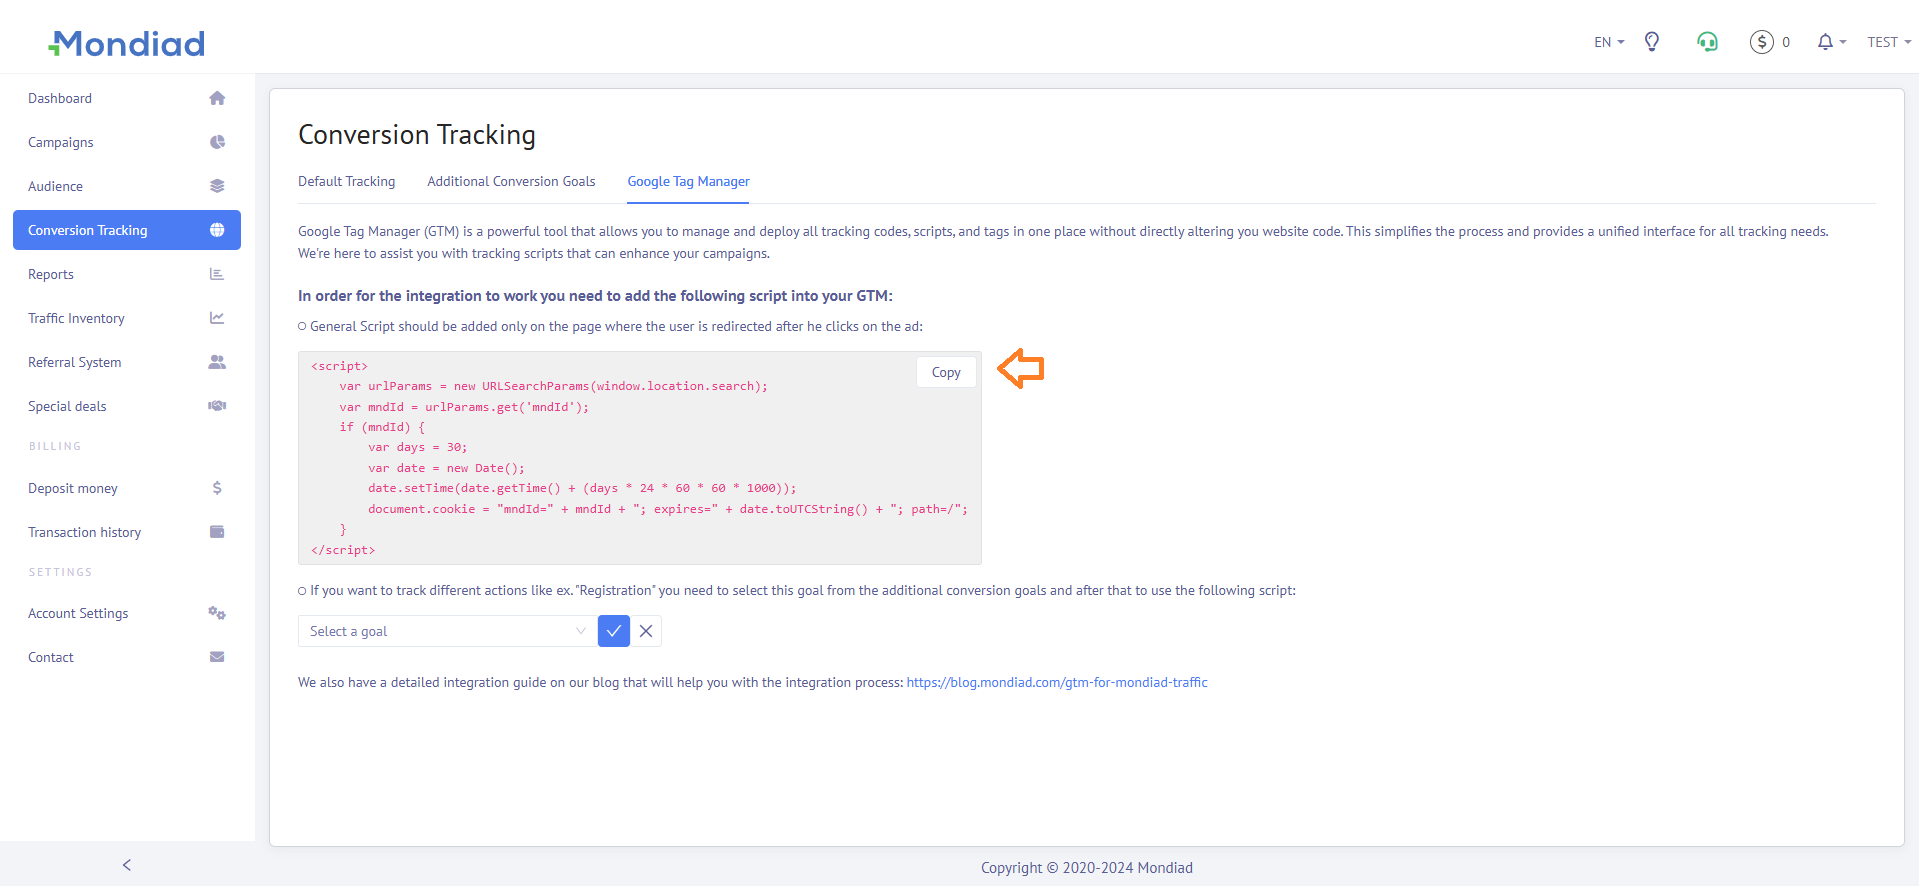
Name your tag something easy to identify, like Mondiad General Script, set the tag type to Custom HTML, and finally, copy and paste your Mondiad-generated script into the HTML box.
To finalize the setup, move on to the “Triggering” section, choose “All Pages” and then save the tag to publish your changes.
💡 Based on your goals, you can decide when the conversion tracking should be fired. Common triggers include:
- Pageview: For tracking visits to a specific page (like a “thank you” page).
- Click Trigger: For tracking clicks on buttons or links.
- Form Submission: For tracking form completions.
More info on triggers, here.
Checking your data
If you want to understand how campaign traffic behaves on your site, you could integrate the Google Tag Manager with Google Analytics.
💡 Note that will need to create a GA4 property (if you don’t already have it) before starting up the integration.
Just create a GA4 event tag in GTM and map your events to be tracked alongside other metrics like bounce rate, session duration, and more.
In GTM, go to Tags -> New -> Google Analytics -> Google Analytics: GA4 Event. (The further setup is the same as the one above, however, it comes with more configuration options.)
Final words
Feel free to adapt this setup according to your specific ad network’s requirements, and always test thoroughly before deploying changes. If you need help, reach out to us!
